
MeArm Open Source Robotic Arm Plans, Kits and Information
MeArm Servo Motor Arduino Wiring Schematics and Source Code

Arduino UNO PWM Pins 11,10,9 and 6
SERVO MOTOR WIRE COLOR CODE
BROWN = GND
ORANGE = +5V
YELLOW = SIGNAL
BREADBOARD
(4) AAA BATTERY PACK
USB PORT
CONNECTED TO PC
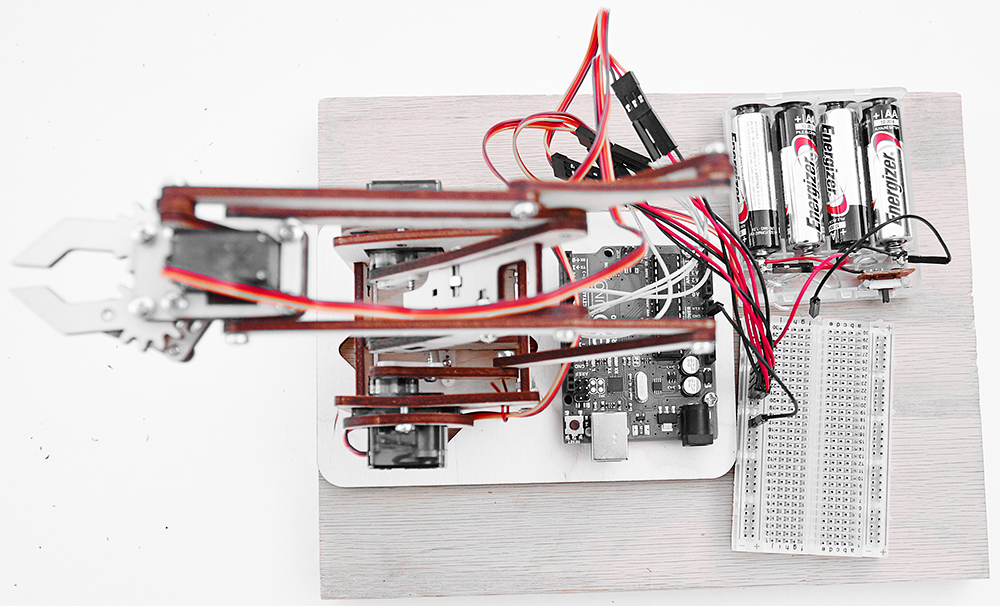
The above wiring diagram shows the pin-out on a Arduino UNO micro-controller board needed to let the sample source code control the robotic arm and communicate with a windows PC running MeCon motion control software. using a standard electronic prototyping breadboard and some jumper wires makes this an easy and fast task. the photo below shows this circuit all wired up.
USB PORT
CONNECTED TO PC
Image of the MeArm with the Arduino all Wired up
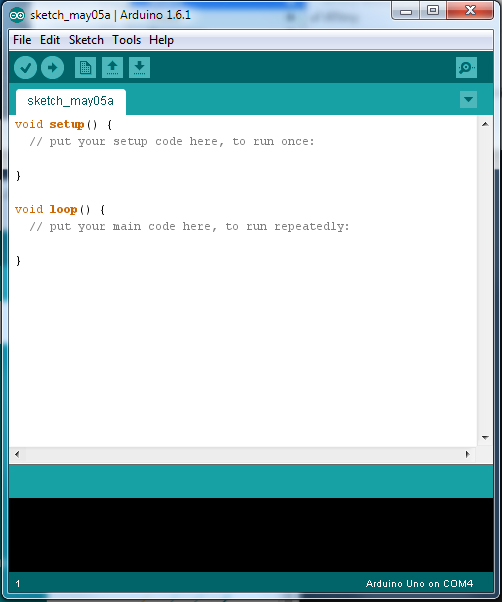
Arduino IDE Software
We will need to have the Arduino IDE software installed on our PC and have the micro controllers USB port connected to a USB port on the computer via a cable in order to transfer the the sample code to the Arduino. if you don't already have the Arduino software you can download it. Below we have the Arduino source code. You can copy and paste this into the Arduino IDE and save it with a meaningful name. Hit the upload arrow button to transfer to the micro controller.
Arduino Code for MeCon Servo Motor Motion Control Software
// MeArmMeCon-A04.ino
//Use With MeCon.exe Ver0.4 Windows Software for MeArm Motion Control
#include <Servo.h>
//MeArm HAS 4 SERVOS
Servo xServo; // create servo object, arm base servo - left right motion
Servo yServo; // create servo object, left side servo - forward backwards motion
Servo zServo; // create servo object, right side servo - forward backwards motion
Servo clawServo; // create servo object, end of arm srevo - open,close the claw hand
//servo positions values, expects 1-180 deg.
int xPos;
int yPos;
int zPos;
int clawPos;
//*************** INIT AT STARTUP *******************************************************************
void setup() { // the setup function runs once when you press reset or power the board
// assign servo to pin numbers
xServo.attach(11); // attaches the servo on pin 11 to the servo object
yServo.attach(10); // attaches the servo on pin 10 to the servo object
zServo.attach(9); // attaches the servo on pin 9 to the servo object
clawServo.attach(6); // attaches the servo on pin 6 to the servo object
// initialize serial port
Serial.begin(9600);
// Debug only send serial message to host com port terminal window in Arduino IDE
//Serial.print("*** MeCom Test V04 ***."); // send program name, uncomment for debug connection test
}
// ******************************************************************************************************
// ********************************** MAIN PROGRAM LOOP START *******************************************
// ******************************************************************************************************
void loop() {
//serial in packet patern = xVal,yVal,zVal,clawVal + end of packet char 'x'
while (Serial.available() > 0) {
xPos = Serial.parseInt();
yPos = Serial.parseInt();
zPos = Serial.parseInt();
clawPos = Serial.parseInt();
if (Serial.read() == 'x') { // Detect end of packet char 'x', go ahead and update servo positions
// UPDATE SERVO POSITIONS
xServo.write(xPos);
yServo.write(yPos);
zServo.write(zPos);
clawServo.write(clawPos);
}
}
}
SHOW ME YOUR MOVES! - MeCon MeArm Motion Control Software
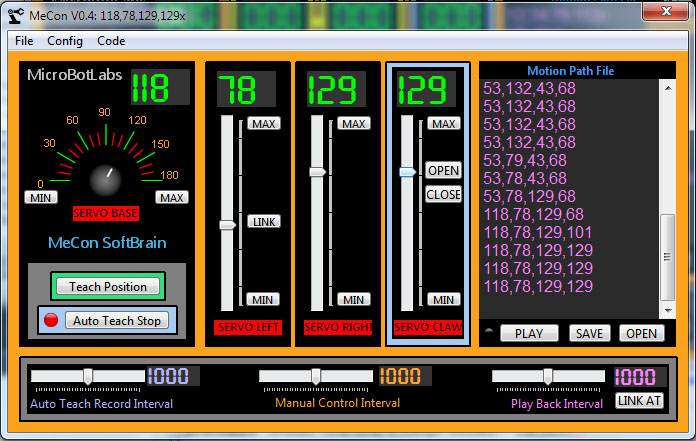
Your MeArm desktop robotic arm should now be all setup and ready to accept movement commands from the MeCon motion control program. Please see our page dedicated to MeCon operation.
License